Quickstart#
About napari#
napari is a fast, interactive, multi-dimensional image viewer, with a vibrant plugin ecosystem that expands its capability to tackle various domain-specific visualization and analysis needs. It is built on Qt (for the GUI), vispy (for performant GPU-based rendering), and the scientific Python stack (numpy, scipy, and scikit-image).
napari is an open source project on GitHub to facilitate transparency, reuse, and extensibility.
At its core, it provides critical viewer features out-of-the-box, such as support for large multi-dimensional data; “layers” to simultaneously visualize images, models, and analysis results; and easy manual, interactive annotation in 3D.
What’s covered in this page#
This tutorial is for napari first-timers to give them a quick glance of what napari does, and give it a try right away. We will cover:
Open napari
Open an image
Image display adjustment
Manually label the cell
Get the cell area measurement
Plugins
Next steps
Along the way, you will see how to access napari functions from Python code and from GUI - though for different purposes, one method might be easier than another. This quick start guide will not cover ALL possible methods but only some ways to perform basic tasks. For the more complete guide, please visit our usage guide.
You will also see some examples of plugins. The core napari viewer focuses on domain-agnostic functions such as layer controls. Analyses and domain specific functions, such as reading a special file format and image segmentation, live in the realm of plugins.
Launch the napari GUI application#
napari can be opened in one of multiple ways, depending on how it’s used in your image analysis workflow.
Here we will be mainly focused on the GUI application.
From command line:
Once installed, run
napari
If you installed the bundled app:
Click on the app icon to open it.
Note: macOS users might need to right click on the app icon and select “Open” to bypass the security check. You can also go to System Settings > Privacy & Security and click on “Open Anyway”.
Tip
Starting with release 0.6.0, you can use the command palette to launch any command. 🎨
Open an image#
napari natively supports tiff and many other formats supported by skimage.io.imread as input image file format.
Try with your own images or download this ome tiff file.
Additional input file formats may be supported by plugins.
Once you have the proper plugin installed, use File > Open Files(s) and select the image file, or simply drag and drop the image into napari.
For demo purpose, we will use a sample image that comes with napari.
Option 1: Using the GUI to open an image#
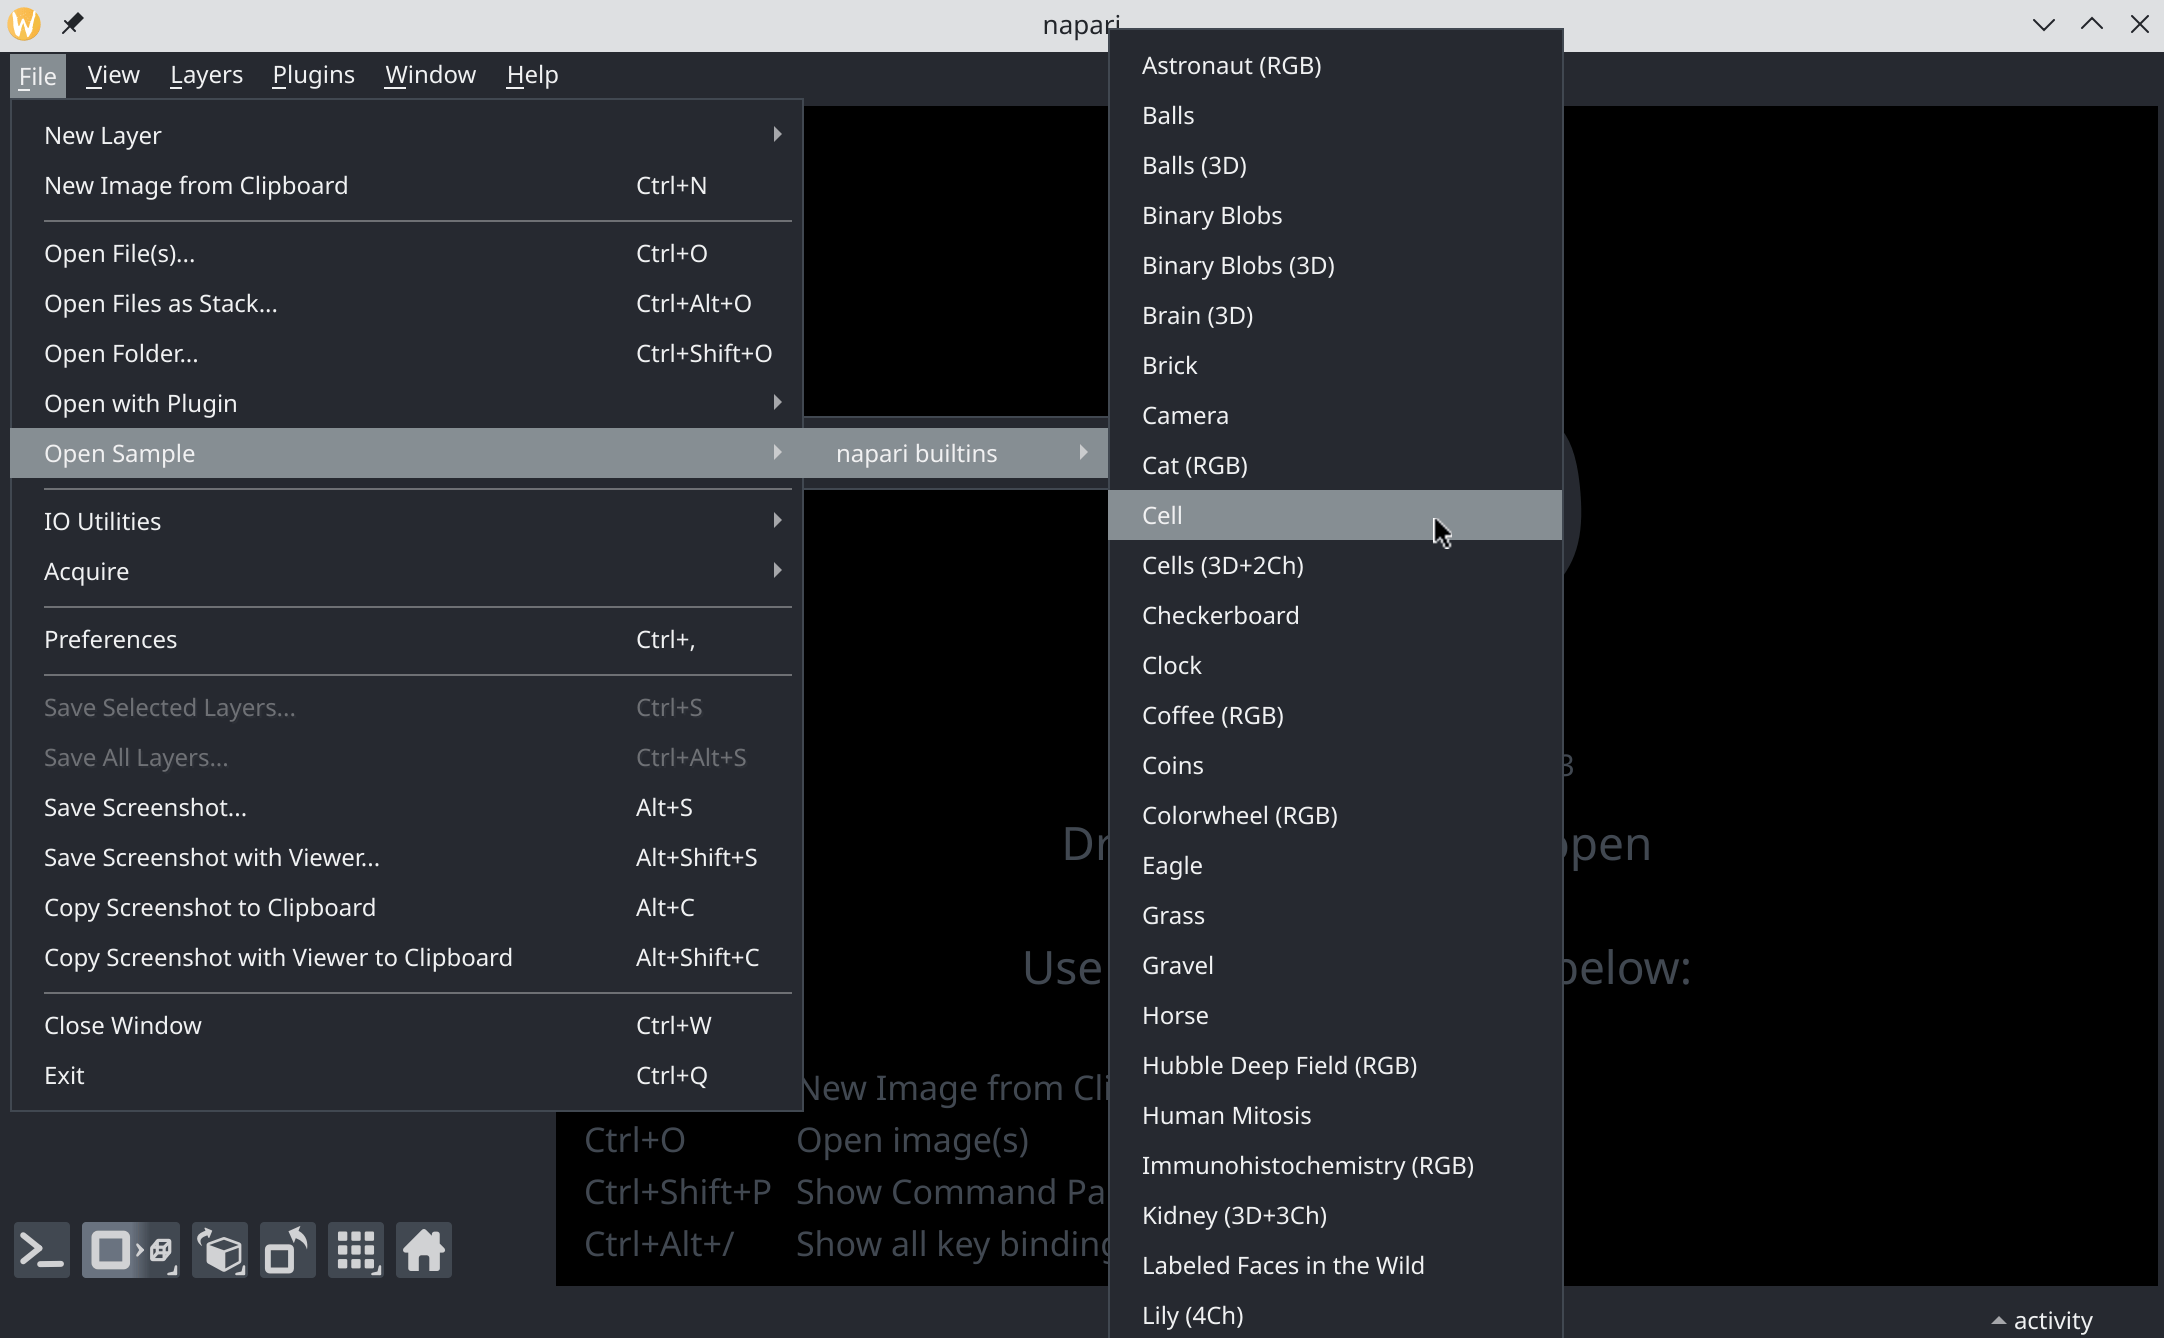
In napari, go to
File -> Open Sample -> napari built-ins -> Cell
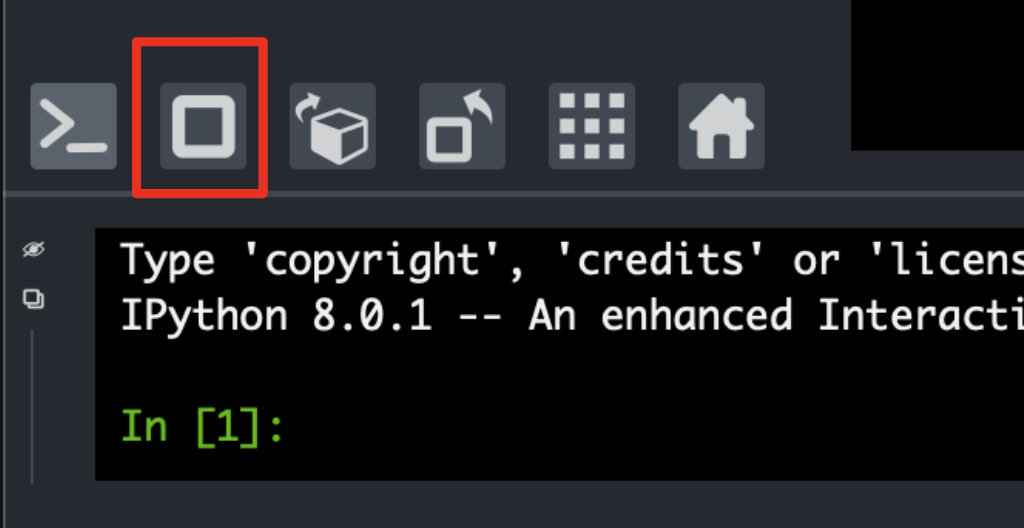
Option 2: Using the napari console to open an image#
Open napari IPython console
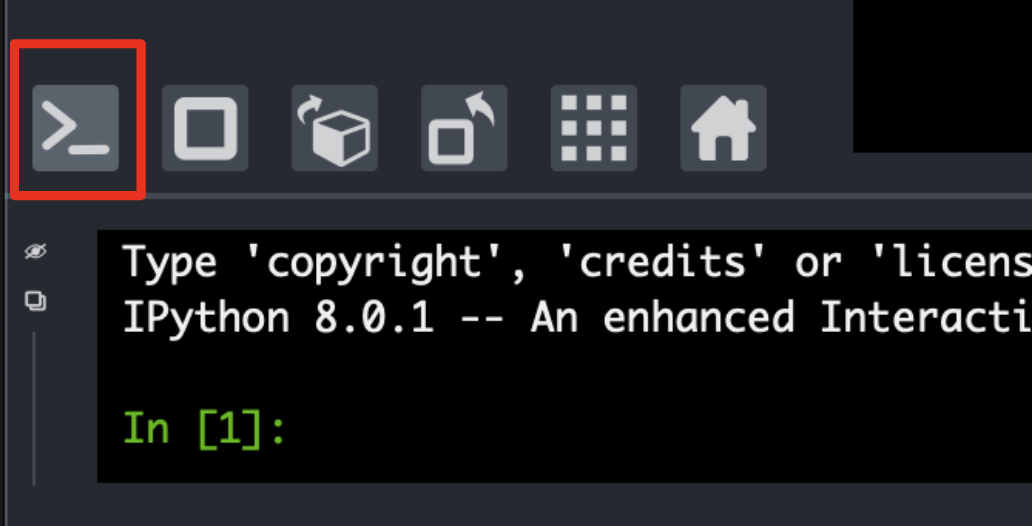
Type
from skimage import data

viewer.add_image(data.cell(), name='cell')
/home/runner/work/docs/docs/.venv/lib/python3.12/site-packages/napari/_qt/qt_event_loop.py:50: UserWarning: System theme detection requires a Qt6 backend. Please switch to PyQt6 or PySide6 to use it.
  theme_type=get_system_theme(),
/home/runner/work/docs/docs/.venv/lib/python3.12/site-packages/napari/_qt/qt_event_loop.py:50: UserWarning: System theme detection requires a Qt6 backend. Please switch to PyQt6 or PySide6 to use it.
  theme_type=get_system_theme(),
WARNING: napari support for the PyQt5 backend is deprecated and will be removed in fall of 2026
/home/runner/work/docs/docs/.venv/lib/python3.12/site-packages/napari/_qt/qt_event_loop.py:50: UserWarning: System theme detection requires a Qt6 backend. Please switch to PyQt6 or PySide6 to use it.
  theme_type=get_system_theme(),

Note
Once you have a napari viewer open, you can also make a new Image layer from an image (or URL to an image) copied to your Clipboard using File -> New Image from Clipboard menu item (keybinding Command/Ctrl+N).
Image display adjustment#
The layer controls panel at the upper left of the viewer allows you to adjust contrast, colormap, and other layer properties. These settings affect the visualization, but do not affect the underlying data.
To change the image display through the API, in IPython console, type
viewer.layers['cell'].colormap = 'yellow'

Manually label the cell#
To measure the area of the cell, we can use a labels layer and manually “paint” the cell.
The labels layer allows you to record the segmentation result by assigning background = 0, and assigning each object with an integer.
Add a new labels layer
Click on “paint”
Circle the cell
Use “fill” bucket to fill it.
Tip
To switch to a new, unique label – one larger than the current largest label – press the default keybinding m.
Get the cell area measurement#
To analyze labels our layer, we can use scikit-image, a popular Python library that comes with your napari installation. skimage.measure.regionprops provides a good set of features that can be extracted from labels, including area measurement.
In IPython console, type
from skimage.measure import regionprops

props = regionprops(viewer.layers['Labels'].data)
print('the cell area is: ', props[0].area)
Alternatively, try this plugin to use a GUI widget instead of the console.
Note: the area reported by regionprops is the number of pixels. Check pixel size and convert the reported number to physical units.
Plugins#
napari features a rich ecosystem of plugins which add functionality to the core napari viewer. Plugins can provide:
file readers/writers, including support for import and export of image and related data types;
support for working with specialized data formats;
domain-specific features and analysis tools, including microscopy, climate, geoscience, and more.
Plugins can be installed as Python packages via pip or conda, or directly from within napari using the napari plugin manager.
To explore existing plugins, visit the napari hub. For more details, check out our documentation on finding and installing plugins.
Next steps#
napari provides a variety of settings that can be adjusted to customize the user experience, including theme and keyboard shortcuts (keybindings). To learn more, see our guide to the Preferences dialog.
napari provides the flexibility to handle multi-dimensional data. Try opening 3D or higher dimensional images, and switch to 3D view. When switching between 2D and 3D, camera center and zoom persist by default — see the camera guide for details on controlling this behavior.
Test some examples to see how to add different layer types and add your own widgets to napari.
Explore other plugins. A few fun ones: napari-clusters-plotter, napari-pyclesperanto-assistant, napari-animation.
If you don’t see the functions you need in existing plugins, try to make your own widget with magicgui.
If you’ve developed some functionality that you think would benefit the community as a whole, consider publishing it as a plugin!
Help the napari project by filing issues for bugs you encounter or features that you’d like to see! Or even better, come join the community meetings and get to know the team.