Note
Go to the end to download the full example as a Python script or as a Jupyter notebook..
Affine transforms#
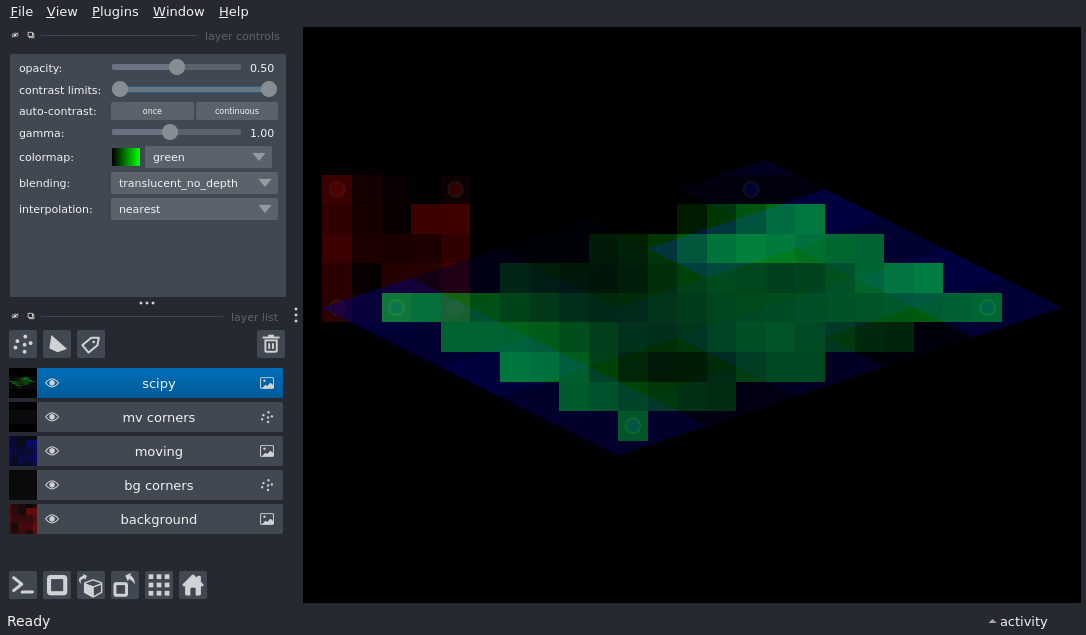
Display an image and its corners before and after an affine transform

import numpy as np
import scipy.ndimage as ndi

import napari

# Create a random image
image = np.random.random((5, 5))

# Define an affine transform
affine = np.array([[1, -1, 4], [2, 3, 2], [0, 0, 1]])

# Define the corners of the image, including in homogeneous space
corners = np.array([[0, 0], [4, 0], [0, 4], [4, 4]])
corners_h = np.concatenate([corners, np.ones((4, 1))], axis=1)

viewer = napari.Viewer()

# Add the original image and its corners
viewer.add_image(image, name='background', colormap='red', opacity=.5)
viewer.add_points(corners_h[:, :-1], size=0.5, opacity=.5, face_color=[0.8, 0, 0, 0.8], name='bg corners')

# Add another copy of the image, now with a transform, and add its transformed corners
viewer.add_image(image, colormap='blue', opacity=.5, name='moving', affine=affine)
viewer.add_points((corners_h @ affine.T)[:, :-1], size=0.5, opacity=.5, face_color=[0, 0, 0.8, 0.8], name='mv corners')

# Note how the transformed corner points remain at the corners of the transformed image

# Now add the a regridded version of the image transformed with scipy.ndimage.affine_transform
# Note that we have to use the inverse of the affine as scipy does `pull` (or `backward`) resampling,
# transforming the output space to the input to locate data, but napari does `push` (or `forward`) direction,
# transforming input to output.
scipy_affine = ndi.affine_transform(image, np.linalg.inv(affine), output_shape=(10, 25), order=5)
viewer.add_image(scipy_affine, colormap='green', opacity=.5, name='scipy')

# Reset the view
viewer.reset_view()

if __name__ == '__main__':
    napari.run()