Note
Go to the end to download the full example as a Python script or as a Jupyter notebook..
Add labels with features#
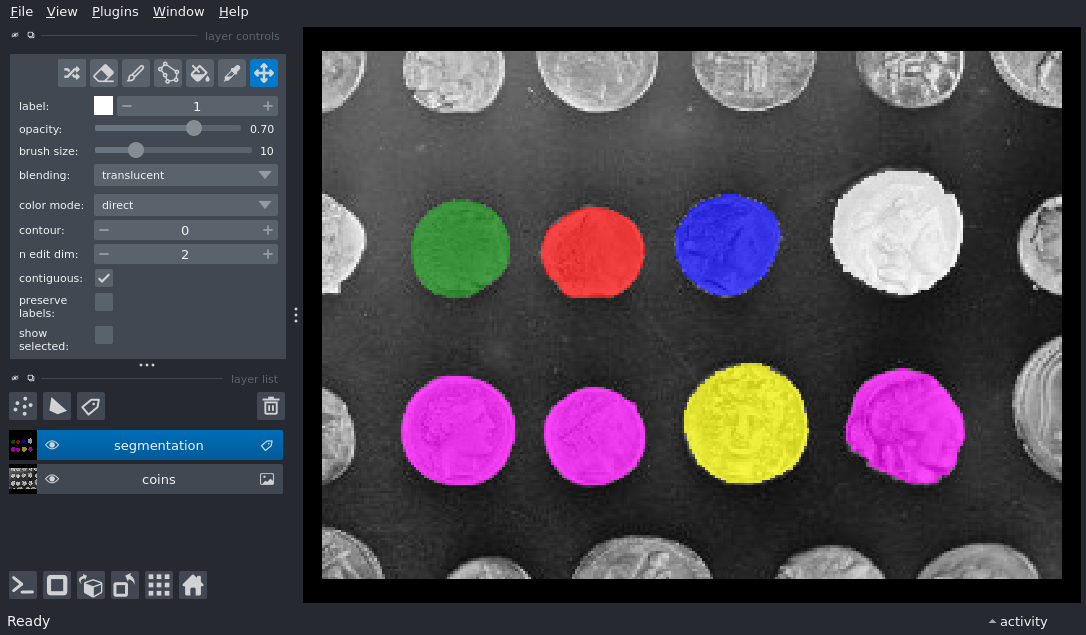
Display a labels layer with various features

/home/runner/work/docs/docs/napari/examples/add_labels_with_features.py:24: FutureWarning: `square` is deprecated since version 0.25 and will be removed in version 0.27. Use `skimage.morphology.footprint_rectangle` instead.
  bw = closing(image > thresh, square(4))
/home/runner/work/docs/docs/napari/examples/add_labels_with_features.py:27: FutureWarning: Parameter `min_size` is deprecated since version 0.26.0 and will be removed in 2.0.0 (or later). To avoid this warning, please use the parameter `max_size` instead. For more details, see the documentation of `remove_small_objects`. Note that the new threshold removes objects smaller than **or equal to** its value, while the previous parameter only removed smaller ones.
  cleared = remove_small_objects(clear_border(bw), 20)
import numpy as np
from skimage import data
from skimage.filters import threshold_otsu
from skimage.measure import label
from skimage.morphology import closing, remove_small_objects, square
from skimage.segmentation import clear_border

import napari

image = data.coins()[50:-50, 50:-50]

# apply threshold
thresh = threshold_otsu(image)
bw = closing(image > thresh, square(4))

# remove artifacts connected to image border
cleared = remove_small_objects(clear_border(bw), 20)

# label image regions
label_image = label(cleared)

# initialise viewer with coins image
viewer = napari.Viewer()
layer = viewer.add_image(image, name='coins', rgb=False)

# get the size of each coin (first element is background area)
label_areas = np.bincount(label_image.ravel())[1:]

# split coins into small or large
size_range = max(label_areas) - min(label_areas)
small_threshold = min(label_areas) + (size_range / 2)
coin_sizes = np.where(label_areas > small_threshold, 'large', 'small')

label_features = {
    'row': ['none']
    + ['top'] * 4
    + ['bottom'] * 4,  # background is row: none
    'size': ['none', *coin_sizes],  # background is size: none
}

colors = {1: 'white', 2: 'blue', 3: 'green', 4: 'red', 5: 'yellow',
          None: 'magenta'}
# Here we provide a dict with color mappings for a subset of labels;
# when passed to `add_labels`, using the `colormap` kwarg, it will be
# internally converted to a `napari.utils.colormaps.DirectLabelColormap`
# Note: we also provide a default color (`None` key) which will be used
# by all other labels

# add the labels
label_layer = viewer.add_labels(
    label_image,
    name='segmentation',
    features=label_features,
    colormap=colors,
)

if __name__ == '__main__':
    napari.run()