Feature highlights#
This page highlights a few napari features that are useful in many scenarios and might be easily overlooked.
The command palette is great to avoid clicking around menus to find that specific command.
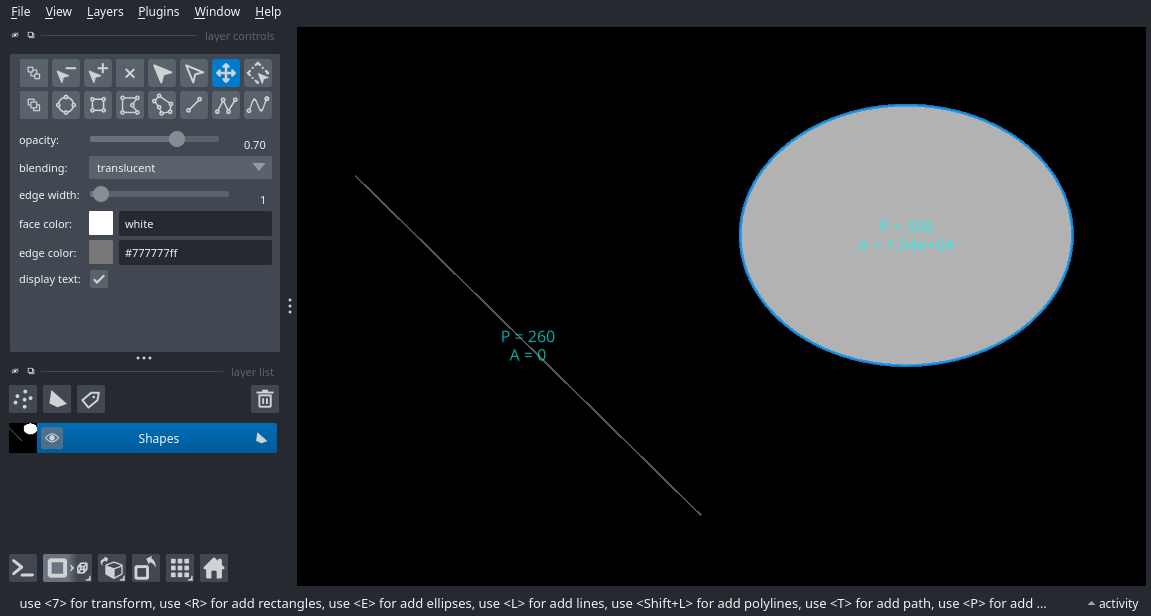
The measurement tool allows for quick distance and area measurements.
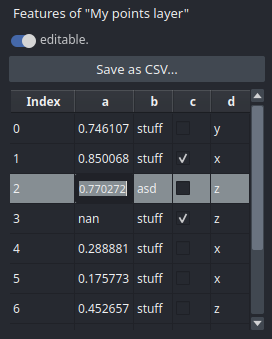
For layers with features, the features table widge provides a simple graphical interface for editing and interaction with the feature table.
Command Palette#
napari has a command palette that can be opened with the keyboard shortcut Command/Ctrl+Shift+P. As you type the action’s name, the command palette will dynamically suggest matching actions. You can continue typing to refine suggestions or use the arrow keys to make a selection. Once you have the action you want highlighted, press Enter to run the action. Added in version 0.6.0.
…
Measure distances and areas#
When using a Shapes layer to annotate features of interest, the Shape Measurement Tool is used to obtain a live measurement of the available shapes, including perimeter and area. You can also measure distances by tracing a Line between two points.
This tool can be enabled by clicking on Layers->Measure->Toggle shape dimensions measurement (napari builltins) while a Shapes layer is selected. As with all other commands, this can also be enabled using the command palette by searching for “shape measurement”.
 .
.
The measurements are displayed on the canvas and updated live, and they are also accessible through the layer’s features table via layer.features['_area'] and layer.features['_perimeter'].
Features table widget#
The Features Table Widget can be used to visualize, edit, select, or save the contents of the features table of any layer that supports features (e.g., Points.features).
 .
.
To open it, go to Layer -> Visualize -> Features Table Widget or press
Command/Ctrl+Shift+P to open the command palette and search for “features”.
To see it in action, see the Features table widget gallery example.
Running python scripts with napari#
Images and other data files are not the only thing that napari can read! You can also run any python script in napari by drag’n’dropping the script onto the viewer, or by passing the script as an argument to napari. When a script is opened with napari, the first viewer instance created by the script will be replaced with the current existing viewer, if any.
It even works with remote files!
napari https://github.com/napari/napari/blob/main/examples/add_3D_image.py
This feature is especially useful for quickly testing or distributing code snippets without needing to leave the viewer or touch the console.
Startup script#
Since napari 0.6.5 it is possible to provide a script that will be run every time napari starts. This can be done by providing a script path in Settings » Application » Startup script. This can be useful, for example, for adding a custom colormap or loading a specific plugin every time napari starts.
Note
This feature is intended only for users. Plugin are not allowed to modify this setting.
As with other settings, the value of this field can be overridden by setting the
NAPARI_APPLICATION_STARTUP_SCRIPT environment variable to the path of the script to run at startup.
Setting it to an empty string will disable the startup script.
