Note
Go to the end to download the full example code
Affine transforms
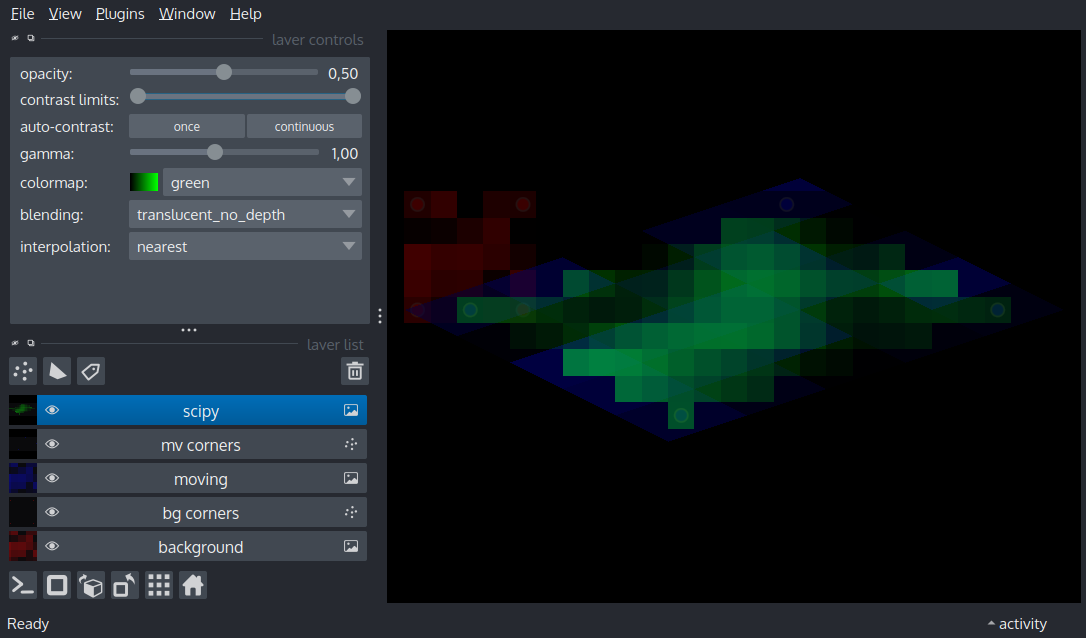
Display an image and its corners before and after an affine transform

import numpy as np
import scipy.ndimage as ndi

import napari

# Create a random image
image = np.random.random((5, 5))

# Define an affine transform
affine = np.array([[1, -1, 4], [2, 3, 2], [0, 0, 1]])

# Define the corners of the image, including in homogeneous space
corners = np.array([[0, 0], [4, 0], [0, 4], [4, 4]])
corners_h = np.concatenate([corners, np.ones((4, 1))], axis=1)

viewer = napari.Viewer()

# Add the original image and its corners
viewer.add_image(image, name='background', colormap='red', opacity=.5)
viewer.add_points(corners_h[:, :-1], size=0.5, opacity=.5, face_color=[0.8, 0, 0, 0.8], name='bg corners')

# Add another copy of the image, now with a transform, and add its transformed corners
viewer.add_image(image, colormap='blue', opacity=.5, name='moving', affine=affine)
viewer.add_points((corners_h @ affine.T)[:, :-1], size=0.5, opacity=.5, face_color=[0, 0, 0.8, 0.8], name='mv corners')

# Note how the transformed corner points remain at the corners of the transformed image

# Now add the a regridded version of the image transformed with scipy.ndimage.affine_transform
# Note that we have to use the inverse of the affine as scipy does `pull` (or `backward`) resampling,
# transforming the output space to the input to locate data, but napari does `push` (or `forward`) direction,
# transforming input to output.
scipy_affine = ndi.affine_transform(image, np.linalg.inv(affine), output_shape=(10, 25), order=5)
viewer.add_image(scipy_affine, colormap='green', opacity=.5, name='scipy')

# Reset the view
viewer.reset_view()

if __name__ == '__main__':
    napari.run()