Note
Click here to download the full example code
Add shapes
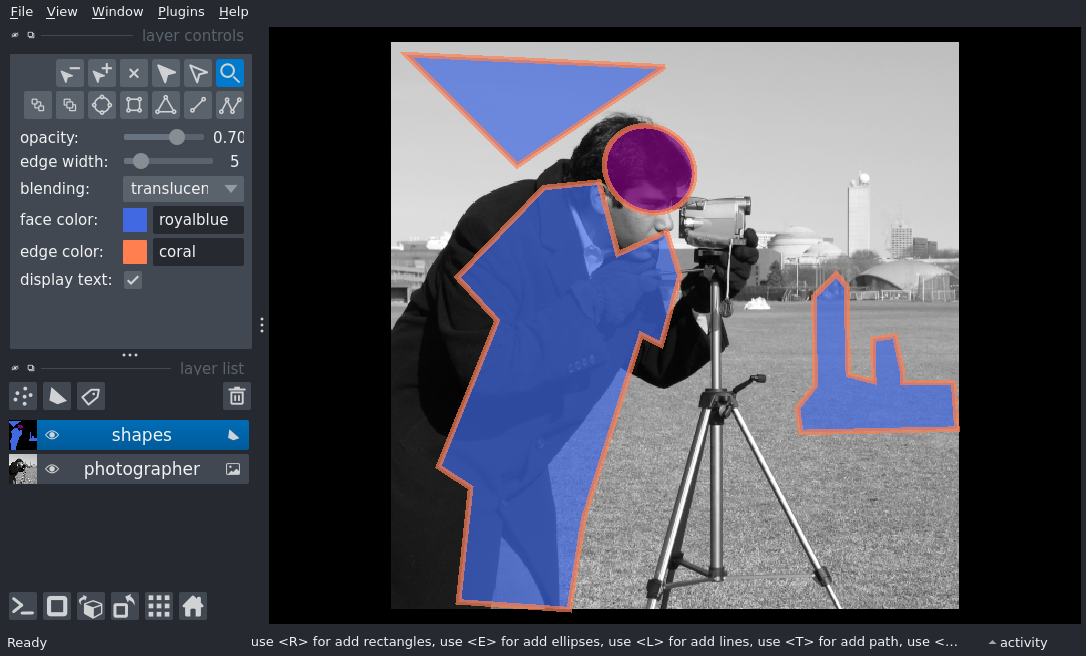
Display one shapes layer ontop of one image layer using the add_shapes and
add_image APIs. When the window is closed it will print the coordinates of
your shapes.

import numpy as np
from skimage import data
import napari


# add the image
viewer = napari.view_image(data.camera(), name='photographer')

# create a list of polygons
polygons = [
    np.array([[11, 13], [111, 113], [22, 246]]),
    np.array(
        [
            [505, 60],
            [402, 71],
            [383, 42],
            [251, 95],
            [212, 59],
            [131, 137],
            [126, 187],
            [191, 204],
            [171, 248],
            [211, 260],
            [273, 243],
            [264, 225],
            [430, 173],
            [512, 160],
        ]
    ),
    np.array(
        [
            [310, 382],
            [229, 381],
            [209, 401],
            [221, 411],
            [258, 411],
            [300, 412],
            [306, 435],
            [268, 434],
            [265, 454],
            [298, 461],
            [307, 461],
            [307, 507],
            [349, 510],
            [352, 369],
            [330, 366],
            [330, 366],
        ]
    ),
]

# add polygons
layer = viewer.add_shapes(
    polygons,
    shape_type='polygon',
    edge_width=1,
    edge_color='coral',
    face_color='royalblue',
    name='shapes',
)

# shapes of each type can also be added via their respective add_<shape_type> method
# e.g. for the polygons above:

# layer = viewer.add_shapes(name='shapes') # create empty layer
# layer.add_polygons(
#     polygons,
#     edge_width=1,
#     edge_color='coral',
#     face_color='royalblue',
# )


# change some attributes of the layer
layer.selected_data = set(range(layer.nshapes))
layer.current_edge_width = 5
layer.selected_data = set()

# add an ellipse to the layer
ellipse = np.array([[59, 222], [110, 289], [170, 243], [119, 176]])
layer.add(
    ellipse,
    shape_type='ellipse',
    edge_width=5,
    edge_color='coral',
    face_color='purple',
)

# To save layers to svg:
# viewer.layers.save('viewer.svg', plugin='svg')

if __name__ == '__main__':
    napari.run()